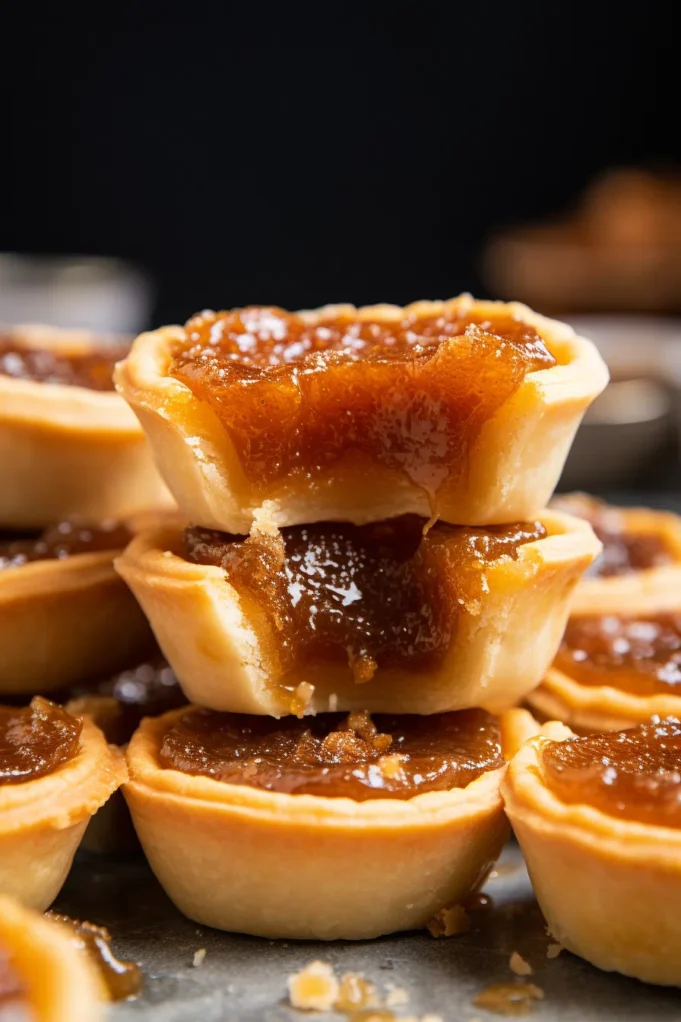
- Enjoy the ultimate Canadian treat by making these Butter Tarts! Using freshly baked pastry shells full of a rich, caramel-like interior, enriched with raisins or pecans. Ideal for people looking for a 25-minute prep that is both speedy and luxurious.

How do I begin, Butter Tarts? These small golden beauties are a journey down memory lane as well as delicious tarts. The memory of my grandmother’s cooking fills me with the scent of brown sugar and melted butter, announcing the coming of these deliciously flaky and gooey morsels. Her go-to tart pan was out for every holiday, family get-together, or just because it was Tuesday. Every tart I’ve made as I’ve continued the practice is an ode to those delicious, buttery memories—a legacy encased in dough!

Why You’ll Love Butter Tarts
- Quick and Simple: These Butter Tarts require just 45 minutes of preparation, making them ideal for last-minute dessert demands or busy bakers.
- Adaptable: You can make your tarts just how you like them, whether you prefer pecans or raisins for their sweetness.
- Canadian Classic: This recipe offers a sense of cultural authenticity and delivers a bit of Canadian culinary tradition straight to your kitchen.
- Versatile Vinegar: The optional white vinegar balances the sweetness and gives each bite an enticing complexity.

Ingredient Notes For Butter Tarts:
Butter Tarts: an easy dish that produces delicious results. The sort of brown sugar (packed for that deep, caramel flavor) and the quality of butter (unsalted for the dough, salted for the filling) are crucial to its success. Try using dark corn syrup for a taste twist that is fuller. All-purpose flour is what gives the crust the ideal texture. Regarding the toppings, each type of nut—pecans or raisins—has its own special appeal. Feel free to experiment for a delicious surprise!

How To Make Butter Tarts
Butter Tarts are a perfect blend of simplicity and deliciousness. The key is in the details, from chilling the dough to getting the filling just right.
Making the Pastry: In a crumbly mixture, mix flour, sugar, salt, and butter. To combine, add some cold water. Here, the temperature plays a key role in creating flaky pastry: cold butter!
Chilling the Dough: After wrapping, place it in the fridge. For a flaky crust and simple rolling, this step is essential.
Shaping and Freezing: After rolling, chopping, and shaping your tarts, quickly freeze them. This aids in keeping their shape when baking.
Filling Magic: Mix filling ingredients with a whisk to achieve a harmonious blend of texture and sweetness. Carefully pour it into the tart shells; don’t fill them to the brim, otherwise you risk a bubbly mess!
Cooking to Perfection: Cook until the filling is just set and the crust is golden. Your first indication of their readiness is the scent.
Serving and Cooling: After allowing them to cool in the pan, move them to a wire rack. For a melt-in-your-mouth texture, serve warm.

Storage Options:
If you have any leftovers after making these delectable Butter Tarts—which is a huge if—they keep beautifully in the refrigerator for a few days. Freeze them for longer storage life! When frozen, they can be kept for roughly three months. Just take sure to give them a gentle defrost in the refrigerator before serving once more.
Variations and Substitutions:
- Gluten-Free Twist: To accommodate people with dietary problems, replace the all-purpose flour with a gluten-free blend.
- Sugar Variations: For a distinctive flavor profile, try experimenting with other kinds of sugar, such as muscovado or coconut.
- Nutty Flair: For a different crunch, consider walnuts or almonds instead of pecans, which are fantastic too.
- Fruit Frenzy: dry cranberries or diced dry apricots can lend a lovely touch to the classic raisins.


